Hey! Today’s post is a piece I love. It seemed my creative mojo had taken a vacation a few months without letting me know in advance. While I have so many beautiful things to create with I just had a blank mind. I normally can look at something and immediately see something in my mind to make with it. Or if someone asks for a custom piece and they have a vague idea of what they want the ideas just start rolling. So I was tickled this weekend to create! I created 3 mixed media canvas’ (the other two will be future posts) and several cards.
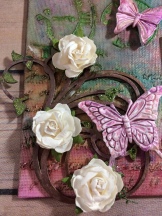
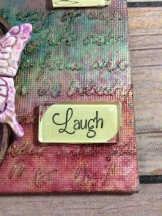
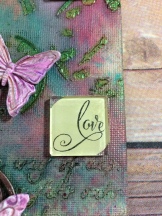
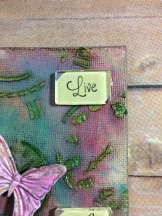
This is the finished piece and there are additional pictures at the bottom so you can have a closer look.
- I started with a blank 5×7 canvas panel. It was pre-gesso’ed so I did not need to do that.
- There were stencils from So Suzy Stamps that I wanted to use on each one. The first was the ‘Art is…’, it is one of my favorites. So using light modeling paste and a paint spatula I laid the stencil on so it took up half of the canvas and covered from edge to edge. I did not worry about cutting of sentences or words because I knew once I was finished it would not show.
- Then I used the clock stencil on the other half of the canvas. Again just doing the various clocks randomly on that side.
- Now, this is the hardest part – set it aside and let it dry. I let mine dry overnight (I am sure it was dry before then).
- Now comes the fun part, spraying ink. I truly just started picking out colors I liked and spraying them. If they started to run together too much and become muddled I used a paper towel and dabbed the yucky part up then used my heat gun. I would suggest drying between colors but I have no patience so I’m positive you will have better luck doing that than I do. I probably used 8 colors. I started out with Fireworks, then 13Arts and finally Lindy’s Stamp Gang. Dried with the heat gun.
- I wanted some of the clock pieces to stand out more. I used Perfect Pearls and Lindy’s Stamp Gang Magicals powder to give it some shimmer. You can kindof see it in the picture but it looks great in person. I don’t know how everyone else applies those products but I did it using Versamark and water. First I take the Versamark pen and brush the areas where I would like to add the powder. If I need to make it thinner or want to ‘paint’ chipboard with it then I use water as well to make it like a paint. I also use water between color changes to blend them.
- Next I went through my storage boxes to find the embellishments. I go through and pull out stuff I like and may want to use and then narrow it down from there. For this one I used a swirly chipboard piece. I had already gesso’ed it some time ago so it was ready for magicals. I used brown, green and then a purpley color at the end.
- Once it was dry I adhered it with ALOT of glue. I tried a little bit and it did not stick. Then I tried hot glue and that didn’t work either. So I went back to the Scotch Quick Dry glue and put a lot on the back and set a heavy acrylic block on top to hold it down. That seemed to do the trick and it was secure.
- I went back with stickles and added green to the leaf shapes on the swirl.
- Then I added the resin butterflies. I sprayed the butterflies with inks and allowed them to dry overnight. However even after that I could still smear the ink. I just happened to have some clear nail polish sitting on my craft table, so I used that to ‘seal’ the ink to the butterfly. It worked BRILLIANTLY! It set the ink and gave them a shiny finish, so I will definitely use that trick in the future.
- I did use hot glue to adhere the butterflies to the canvas.
- It still needed something, so I decided on the little ivory roses. I twirled the stems around a small paint brush handle to give them a curl.
- After all of that was done I felt like it still needed something. That’s when I thought of the little acrylic pieces. I’ve been waiting to have a project where I could use them.
- I picked out 3 stamps, found blocks to fit and then paper that would match well. I stamped the images on the paper using Stayz On ink. Then cut them out in pieces to fit the blocks.
- I thought rounding the edges would work well. What I didn’t realize was that the paper was so small it rounded kindof the whole side so I could only do one corner. I did a corner on each side and I actually like how it came out. You can kindof see it under the block.
- It was easy to adhere the paper to the canvas but then I wasn’t sure how to add the blocks where it would remain perfectly clear. I tried Crystal Effects and it worked perfectly. I put a little squiggle of the liquid onto the block and then pressed it down so make sure it dispersed an hopefully not leave a line.
That was it. I know it seems like a lot but there is a lot of my rambling in the directions. It’s a little different than what I have posted before and wanted to make sure everything was clear. If you would like additional direction please let me know, I’ll be glad to help.
Thank you for reading!
Amy
Additional images:
Supplies Used:
So Suzy Stamps (link on the left side of my blog)
– Clock, Art is Stencils
– Live, Laugh, Love (Love You but I only inked the love) Stamps
– Fireworks Ink Sprays
Stampin Up Amy (www.stampinupamy.stampinup.net)
– Glossy Accents
– Paper
– Black Stayz On Ink
– Heat Gun
Other
– Canvas Panel
– Light Modeling Paste, Paint Spatula to apply
– Chipboard Swirl
– Paper Roses
– Perfect Pearls
– Lindy’s Stamp Gang Sprays and Magicals Powder
– Resin Butterflies (sprayed with ink then covered with clear fingernail polish)
– Stickles
– Hot Glue, Scotch Quick Dry Glue
– Tim Holtz Acrylic Pieces


Great Job! Glad you found your mojo again!!!
LikeLike
Thank you so much! I’m already planning more! I need some new stencils….lol
LikeLike
LOL Lucky you, I have a TON coming in!
LikeLike
Stunning job, Amy!!!!! I love it!
LikeLike
Pingback: Love Letter – Mixed Media – So Suzy Stamps | Amy's Artsy Stuff